

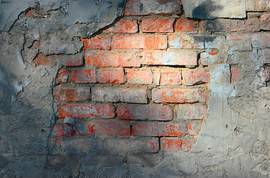
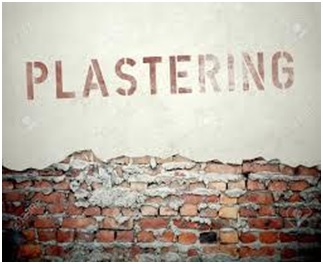
Plastering is a process of rendering mortar onto a surface to bond the bricks and also to cover the same inside outside and ceiling mortar. There are different grades and types of plaster mortars also ways of rendering the same are different.
To understand the composition of plastering material or mortar is it is made up of cement and sand with additives based on requirements. For example while fixing bricks the composition of mortar is different from what is used for inside or outside and ceiling. The mortar required for chemical/heat/water resistant mortar it is different.
Advantage of dry plaster mortar are:
- We can be sure of quality and quantity of material
- Reduction of: labour (1 helper for 4 masons against 2 helpers per mason and mixing, shifting labour and space extra)
- Fall back loss,
- Comes with waterproof and crack resistance property. Can be easily incorporated with fire, chemical, heat resistant versions.
Areas of application:
Repair works:
Projects:
Factors to be considered while selecting cement for plaster mortar
- There are several important factors that need to be considered while selecting cement. The pivotal ones are discussed below;
- It is essential that cement set neither too rapidly nor too slowly. In the first case there might be insufficient time to transport and place the concrete before it becomes too rigid. In the second case too long a setting period tends to slow up the work unduly, also it might postpone the actual use of the structure because of inadequate strength at the desired age.
- Setting should not be confused with hardening, which refers to the gain in mechanical strength after a certain degree of resistance to the penetration of a special attachment pressed into it.
- Setting time is the time required for stiffening of cement paste to a defined consistency.
- Indirectly related to the initial chemical reaction of cement with water to form aluminum-silicate compound.
- Initial setting time is the time when the paste starts losing its plasticity.
- Initial setting time test is important for transportation, placing and compaction of cement concrete.
- Initial setting time duration is required to delay the process of hydration or hardening.
- Final setting time is the time when the paste completely loses its plasticity.
- It is the time taken for the cement paste or cement concrete to harden sufficiently and attain the shape of the mould in which it is cast.
- Determination of final setting time period facilitates safe removal of scaffolding or form. During this period of time primary chemical reaction of cement with water is almost completed.
REQUIREMENTS OF GOOD PLASTER
The plaster material should fulfil the following requirements:
- It should adhere to the background, and should remain adhered during all variations in seasons and other atmospheric conditions.
- It should be hard and durable.
- It should possess good workability.
- It should be possible to apply it during all weather conditions.
- It should be cost efficient.
- It should effectively check penetration of moisture.
TYPES OF MORTARS FOR PLASTERING
The selection of type of plaster depends upon the following factors:
- Availability of binding materials.
- Durability requirements.
- Finishing requirements.
- Atmospheric conditions and variations in weather.
- Location of surface (i.e. exposed surface or interior surfaces).
CEMENT MORTAR – the best mortar for external plastering work
Cement mortar is the best mortar for external plastering work since it is practically non-absorbent. It is also preferred to lime plaster in both rooms etc., and in damp climates. Cement mortar is much stronger than lime mortar. The mix proportion (i.e. cement : sand) may vary from 1:4 to 1:6. Sand used for plastering should be clean, coarse and angular. Cement plaster is applied either in two coats or in three coats, the former being more common. For inferior work, single coat plaster is sometimes provided.
NUMBER OF COATS OF PLASTER
The background over which plastering is to be done depend upon the type of wall construction, such as random rubble (R.R.) masonry, coursed rubble masonry, brick masonry
TWO COAT PLASTER: The following procedure is adopted:
- The background is prepared by raking the joint to a depth of 20 mm, cleaning the surface and well-watering it.
- If the surface to be plastered is very uneven, a preliminary coat is applied to fill up the hollows, before the first coat.
- The first coat or rendering coat of plaster is applied, the thickness being equal to the specified thickness of plaster less 2 to 3 mm. In order to maintain uniform thickness of plaster, 15 cm x 15 cm size. Two dots are formed in vertical line, at a distance of about 2 m, and are plumbed by means of a plumb. A number of such vertical screeds are formed at suitable spacing. Cement mortar is then applied on the surface between the successive screeds and the surface is properly finished.
- Before rendering hardens, it is suitably worked to provide mechanical key for the final or finishing coat. The rendering coat is trowelled hard forcing mortar into joints and over the surface. The rendering coat is kept wet for at least 2 days, and then allowed to dry completely.
- The thickness of final or finishing coat may vary between 2 and 3 mm. Before applying the final coat, the rendering coat is damped evenly. The final coat is applied with wooden floats to a true even surface and finished with steel trowels. As far as possible, the finishing coat should be applied starting from top towards bottom and completed in one operation to eliminate joining marks.
THREE COAT PLASTER
The procedure for applying three-coat plaster is similar to the two-coat plaster except that an intermediate coat, known as floating coat is applied. The purpose of this coat of plaster is to bring the plaster to an even surface. The thickness of rendering coat, floating coat and finishing are kept 9 to 10 mm, 6 to 9 mm and 2 to 3 mm respectively. The rendering coat is made rough.
The floating coat is applied about 4 to 7 days after applying the first coat. The finishing coat may be applied about 6 hours after the application of floating coat.
In single coat plaster is in inferior quality work for rectification. It is applied similarly as two-coat plaster except that the rendering coat, as applied for two-coat plaster, is finished off immediately after it has sufficiently hardened.
PREPARATION OF BACKGROUND OF PLASTER
For plastering new surfaces, all masonry joints should be raked to a depth of 10 mm in brick masonry and 15 mm in stone masonry for providing key to the plaster. All mortar droppings and dust, and laitance (in case of freshly laid concrete) should be removed with the help of stiff wire brush. Any unevenness is levelled before rendering is applied. For finish applied in three coats, local projections should not be more than 10 mm proud of general surface and local depressions should not exceed 20 mm. For two-coat plaster, these limitations are 5 mm and 10 mm respectively. The surface should be washed with clean water and kept damp uniformly to produce optimum suction. In no case should the surface be kept so soaked that it causes the green mortar to slide off, or so dry that it causes strong suction which withdraws moisture from mortar and makes it weak, porous and friable. If plaster is to be applied on old surface, all dirt, oil, paint etc. should be cleaned off. Loose and crumbling plaster layer should be removed to its full thickness and the surface of the background should be exposed and joints properly raked. The surface should be washed and kept damp to obtain optimum suction.
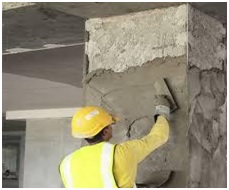
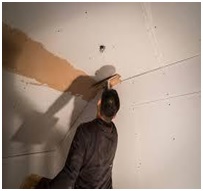
METHODS OF APPLICATION: Plaster mortar can be used as a
- Gunnetting
- Grout
- Spraying
- Rendering
- Ttroweling
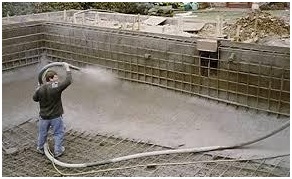
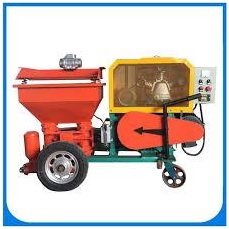
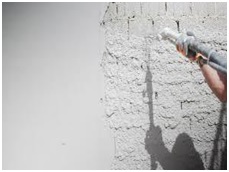
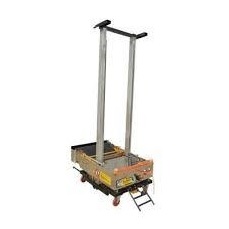
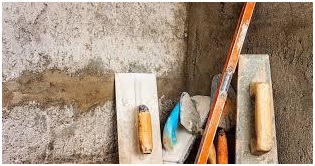
First three processes are electro mechanical process and last one is labour based. If the grain size of mortar combination is good enough same mortar can be used in all process otherwise micro plaster is required for spraying slightly coarse material can be used for grout, rendering and troweling.
DEFECTS IN PLASTERING
The following defects may arise in plasterwork:
1. Blistering of plastered surface
This is the formation of small patches of plaster swelling out beyond the plastered surface, arising out of late slacking off line particles in the plaster.
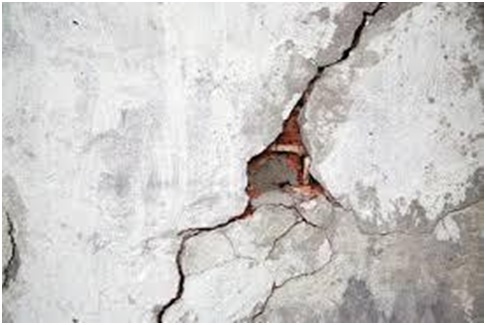
2. Cracking
Cracking consists of formation of cracks or fissures in the plaster work resulting from the following reasons:
- Imperfect preparation of background.
- Structural defects in building.
- Discontinuity of surface.
- Movements in the background due to its thermal expansion or rapid drying.
- Movements in the plaster surface itself, either due to expansion (in case of gypsum plaster) or shrinkage (in case of lime sand plaster).
- Excessive shrinkage due to application of thick coat.
- Faulty workmanship
3. Crazing: It is the formation of a series of hair cracks on plastered surface, due to the same reasons which cause cracking.
4. Efflorescence: It is the whitish crystalline substance that appears on the surface due to the presence of salts in plaster-making materials as well as building materials like bricks, sand, cement etc. and even water. This gives a very bad appearance. It affects the adhesion of paint with wall surface. Efflorescence can be removed to some extent by dry brushing and washing the surface repeatedly.
5. Flaking: It is the formation of very loose mass of plastered surface, due to poor bond between successive coats.
6. Peeling: It is the complete dislocation of some portion of plastered surface, resulting in the formation of a patch. This also results from imperfect bond.
7. Popping: It is the formation of conical hole in the plastered surface due to presence of some particles, which expand on setting.
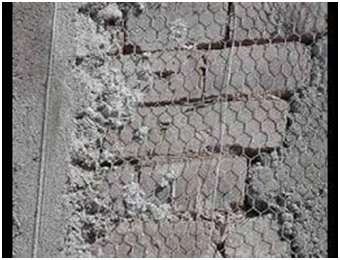
8. Rust stains: These are sometimes formed when plaster is applied on metal laths.
9. Uneven surface : This is obtained purely due to poor workmanship
Plaster Mortar for fixing bricks, plastering inside outside and ceiling
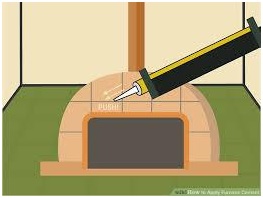
We in PROTECTAGROUP have developed plaster mortar which is universal that can be used for fixing bricks, plastering inside outside and ceiling. We also have developed mortar using construction waste with good binder and waterproofing, crack and heat resistance property. To address the requirements of chemical resistance for industrial and sewage treatment plants etc we have different grades similarly for heat and flame resistance.
Types of plastering are for bonding bricks, covering inside outside and ceiling apart from gunnetting/ for fixing tiles and lining material for them.
All these are available with us under the brand name PERFECTPLAST.